The Stampscapes® 101: Simplescapes
North Star "Miniscapes"

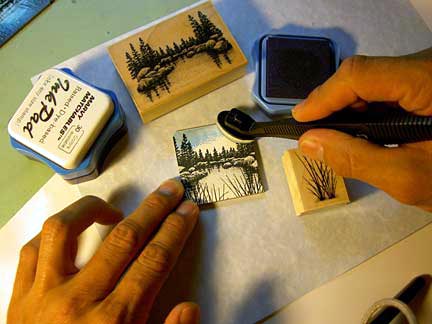
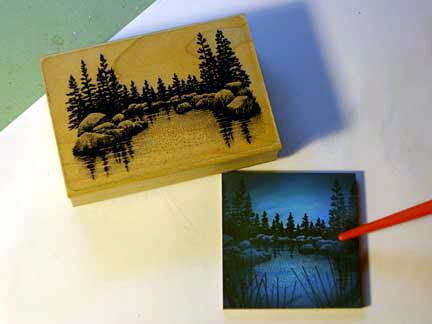
1) Lakeside Cove 048E and Reeds 067B were stamped in black.
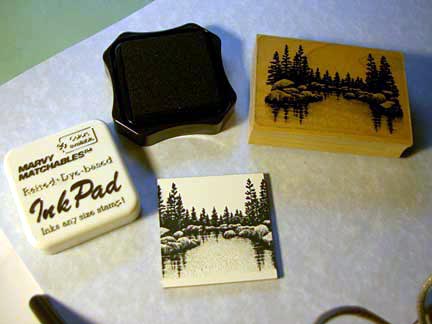
A small working surface for a scene here.
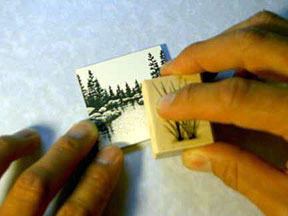
Stamping the Reeds image. I stamped this image about four times changing the height from impression to impression to add variety.
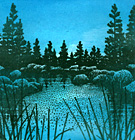
2) A light blue (Marvy #60 Salvia Blue) was added with a Colorbox Stylus Tool. I toned most of the scene. You don't need to be careful with this color at this stage.
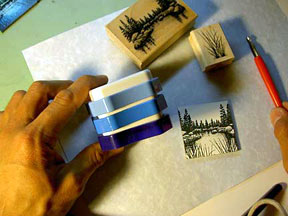
Choosing a color scheme. I like having a range of values starting from light to dark within a hue. In this case that hue is blue.
Adding the first blue to the scene.
3) The second blue was added (Marvy #10 Light Blue).
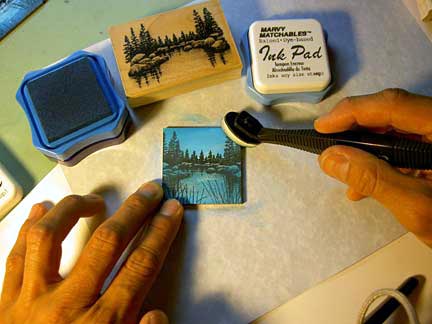
Applying color with the Stylus Tool.
4) The third blue was added (Marvy #3 Blue). At this stage I was a little careful not to completely tone out the entire scene with this value of blue. I wanted a little variation in the scene so I kept he horizon area a little lighter by not going over it with the Stylus.
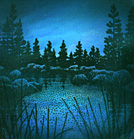
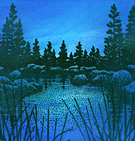
5) Black was added around the perimeter of the scene to contain and frame the composition. Plus, I wanted the stars that I was planning to scratch into the scene to show up nice and bright against a dark sky.
6) Started scraping highlights into the rocks and trees in the scene. I just took off a shallow layer of ink at this time. I tend to reveal the medium colors under the dark surface in the scene before getting to the strong highlights (deeper scrapes/cuts) at this point.
Many people ask me where to add highlights. One simple way to approach some highlights is to look at the design itself. Find out where the highlights are in the design and start enhancing them with lighter marks, in this case, through scratching. Here you can see where the rocks are lighter so I started there.
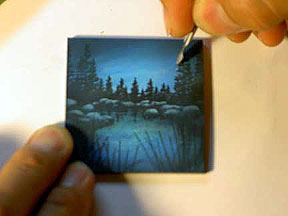
Scratching a tree limb.

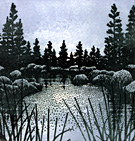
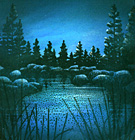
7) The North Star was scratched into the scene and a mirror image of it in the water. Smaller stars were added to the scene and fully highlighted rocks and trees

8) A swipe or two of Pearlescent ink was added to the water. I don't know if it scanned or not but the ink leaves a shimmer to it that I thought would look good in the lake. When I was completely done with the scene, I sprayed it with a Minwax Polyurethane that comes in a spray can. You can find this at hardware stores in the stain section usually. It's a clear sealant spray that will really bring out the saturation in a stamped scene as well as seal and protect it.
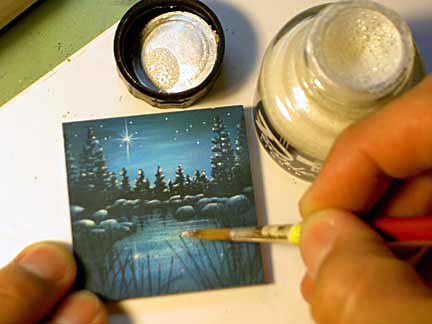
Adding white Pearlescent ink.