Fall Forms on Claybord

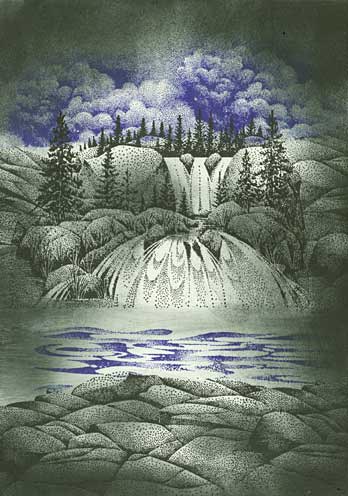
1) Cascading Falls Lg 015G and Ledge 054F was stamped was stamped in black. Note: Ledge was stamped not only on the bottom of the scene but also to each side of the Falls to fill out the rocks to the edge of the card.
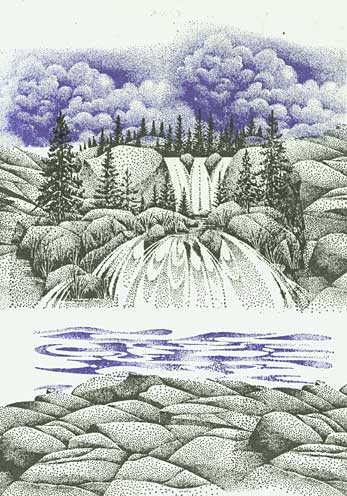
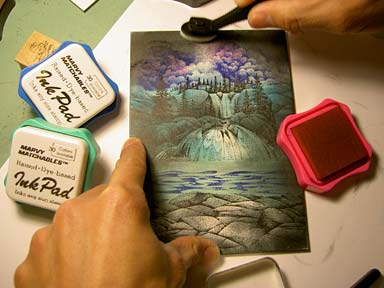
2) Cloud Cumulus 018E was stamped twice and Mystical Waters 255G once in Marvy ink #29 "Prussian Blue". See masking notes below
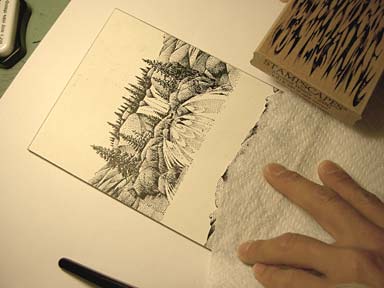
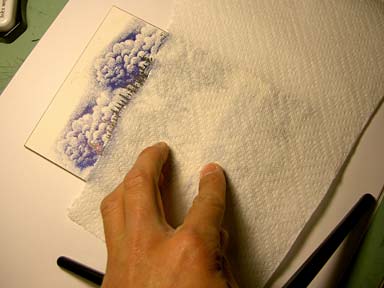
With a simple ripped paper towel, cover the Ledge. Have some of the ledge showing to avoid a line/empty space between the Mystical Water stamp and the Ledge.
Stamp the Mystical Water stamp avoiding an over stamping the Cascading Falls lg. Put good pressure around the paper towel area. The towel is thin but it still has volume so the rubber stamp, right next to the paper towel, might not touch the paper w/o ample pressure.
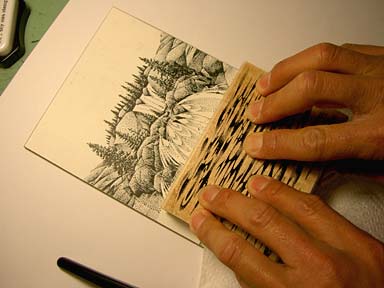
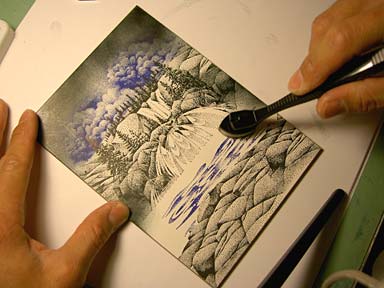
I'm doing the same thing with the Falls as I did the the Ledge. I covered the Falls with a paper towel and I'm making an impression with the Cloud Cumulus here.
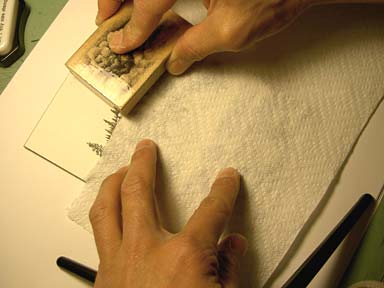
Two impressions of the cloud were stamped.
3) With a Colorbox Stylus Tool, black was added to the scene framing off the Falls and to give shade and volume to the rocks. Note: some of the falling water was left light as though some light was reflecting off them.
Use a light tapping motion with the Stylus Tool when applying ink. Work an area as opposed to trying to tone in the entire scene all at once. You'll get a smoother application of color this way.
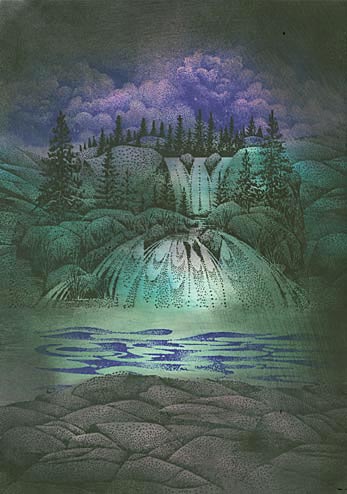
4) Marvy #59 Rose Marie, #34 Pale Green, and #10 Light Blue was was added to the scene with the Stylus Tool. I used these colors in sections as I was going for more of a flat application of color. The Ledge and Clouds were colored in the Rose Marie, water area was colored with the Pale Green and the falls were colored in Light Blue. I know -- this scene is looking *ugly* at this point. I know. However, this isn't my destination with this scene. I purposely colored this scene dark as I needed a background that would show the scratch marks to come with the subtractive process.
Tap as opposed to dragging your Stylus Tool when applying ink to Claybord. The clay is so absorbent that if you drag, you might tear the foam right off the tool.
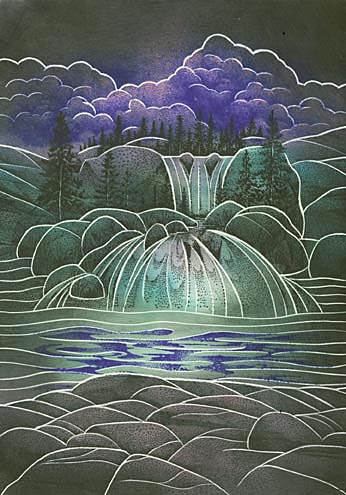
5) Using a scratch knife I outlined every object that I could see in the scene. I made some of the line weights a little different. For example, where the edge of the clouds meet open space above, I made that line a little wider. This creates variation. Scene looks pretty weird here. Maybe like a stained glass style of segmentation?
6) Here I've gone into the individual forms and scratched the top surfaces of them. To model the forms I scratched more off the top of the forms and less as they curved down. For example, see each rock of the ledge. You'll notice they're lighter at the tops. This means more ink was scratched off there. This gives the impression that light is shining on them from above.

I'm scratching away at the top of a rock. I've already gone into some of the sky and the falls by now.
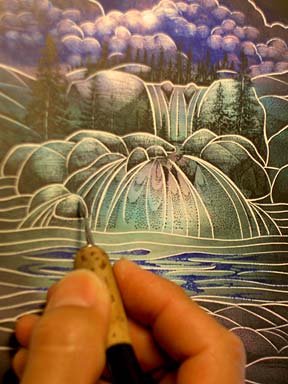
I've already scratched the top of this little rock but I'm going back in for an even lighter section on it to give it a "rounder" more modeled feel.
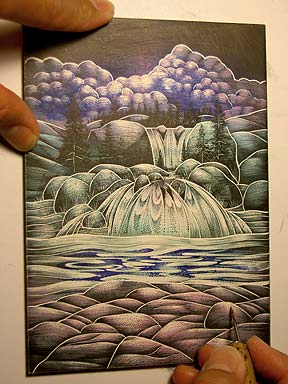
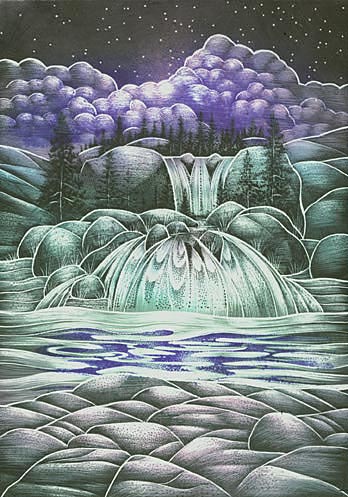
Most of the scratching has been done at this point. I went into the water and on some of the upwardly curved areas I scratch highlights to model the flow and the ledge has largely been addressed.
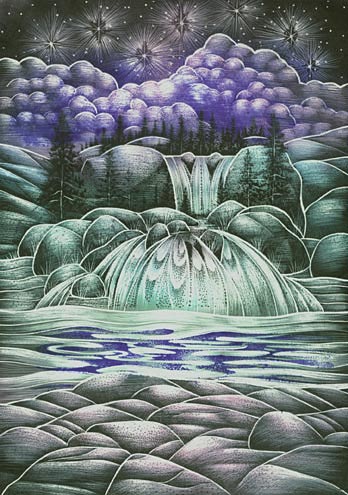
7) Stars were added to the sky area above the clouds. I made little points of light and then added the flares around the stars by scratching lightly little hatch marks emanating from that point.
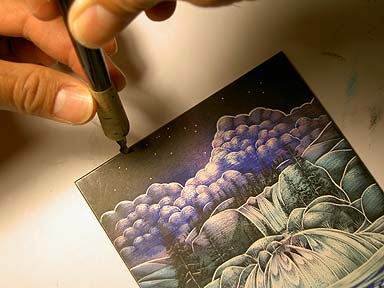
Making stars.