Linda Ellenwood Lesson II
Lavender Morning
NOTE: For this lesson, you will need Lavender Brilliance iridescent reinker, Stampscapes stamps Autumn Brook #212G, Sugar Bark Hickory#242G. Sedge Cluster sm #265D, Sedge Filler # 251C, 07A Ducks in Formation, #016B cattails, #067B Reeds,#262 Loon with Reflection, and #122F Bare Branch large. Stylus Tool by Color Box with white tip. Marvy brush markers or stamp pads #5 Yellow, #43 Brilliant Yellow, #15 Olive Green, #72 Pine Green, #4 Green, #18 Dark Brown, and a real wet Black. Cut and Dry foam or a cosmetic sponge and very glossy paper, I use King James cast coat 10 point.
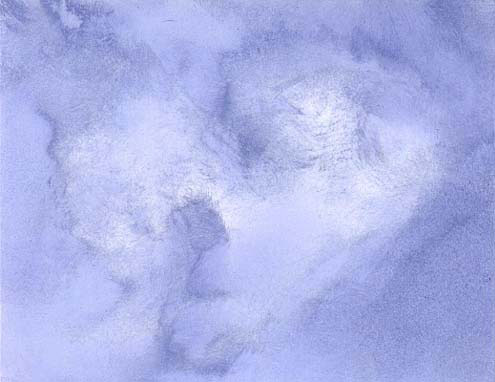
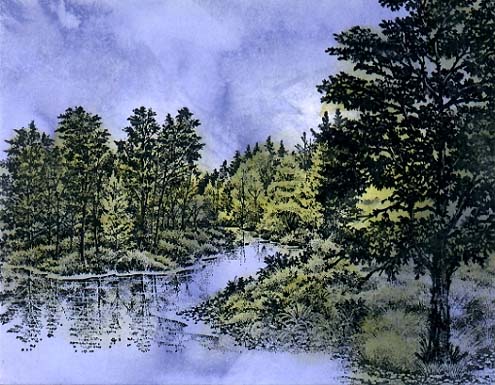
1. Squirt a very small line of Lavender Pearlescent Brilliance reinker on a piece of plastic.
2. Pat your foam or sponge in the ink and bounce a little on the plastic to spread the ink out a bit.
3. Now just smoosh it all around on your paper. I like to use a circular motion. As you play with it you'll see that you can just keep going back over it to add and remove ink until you like what you see. I try to leave some almost white areas for contrast...check that on the sample.
4. Now the hard part is leaving the paper alone until it's totally dry. You can hurry it up with your heat gun but I'm not great with the gun and my paper warps. I usually do mine the night before I need them. It's great to have a bunch of these ahead.
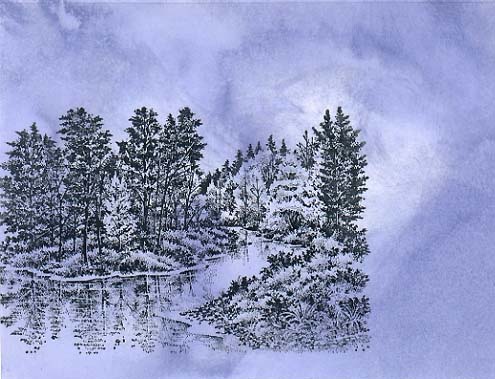
Stamp Autumn Brook #212G with black ink. I like the Marvy pads best. Make sure your stamp pad is very wet and juicy for this.
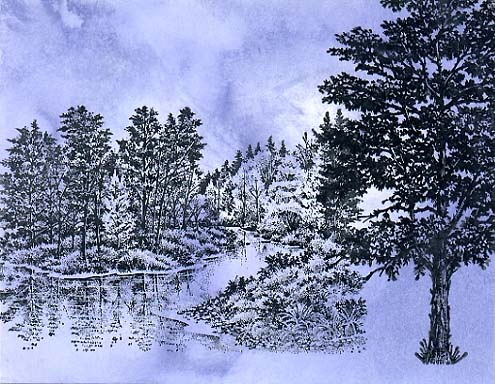
Stamp Shagbark Hickory 242G with black ink.
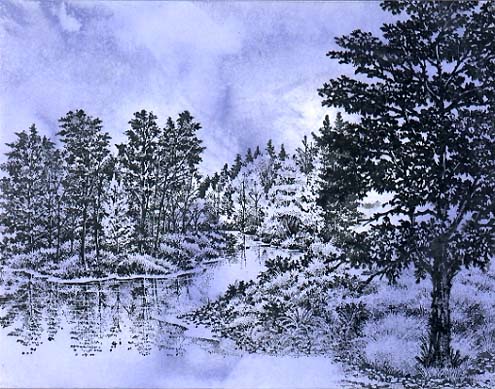
Stamp Sedge cluster sm #265D and Sedge Filler #251C at the base of the tree for ground. I also vey lightly stamped the sedge filler in the tree, without reinking it.....actually I dropped the stamp but it landed in a good place and didn't hurt the picture.
Now heat set the ink. Just use you heat gun. This is so the ink won't smear when you do the next step. Be careful not to warp the picture.
Use your Marvy #5Yellow and #43 Brilliant Yellow stamp pads. Scribble Marvy brush markers on a piece of plastic if you don't have the pads. Make sure your picture is cool, and then use a stylus tool (made by Color Box I use the white oval or leaf tips)or a paint brush to add the yellow where you want highlights in your picture. Pat your color on instead of rubbing. If you rub you may smear the black ink. I color most of the trees and ground then when I go over with green I'll get different shades. Put a very little bit of yellow in the reflection in the water.
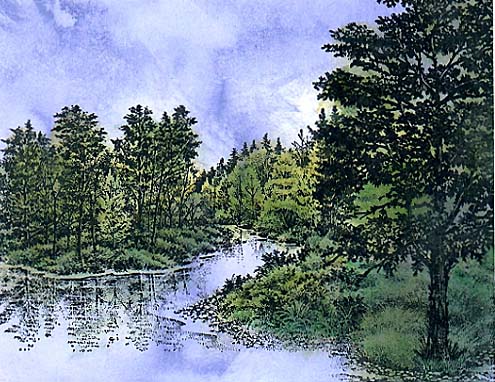
Scribble Marvy Brush markers #15 Olive Green,#4 Green and #72 Pine Green in separate spots on a piece of plastic and use the stylus tool to pat color on the trees and ground. Pat your color on instead of rubbing. If you rub you may smear the black ink. Be careful not to blend your colors too much or you'll lose your highlights. Don't forget to put a little color in the reflection in the water, you just want a little.
Use Dark Brown #18 Marvy LePlume II or a small brush to color the tree trunks. Use you stylus tool and the #18 stamp pad to add shadows under the trees and to color the rocks at the water edge. Be careful not to do too much.
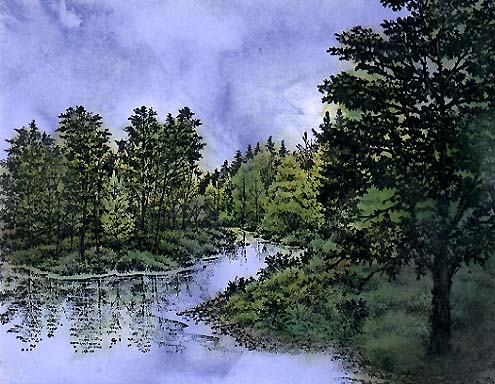
Use black Marvy ink and stamp the #07A "Ducks in Formation," and #016B "cattails" and #067B "Reeds" in a few places at the bottom of your picture.
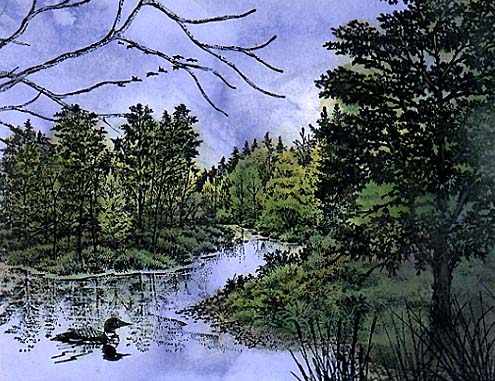
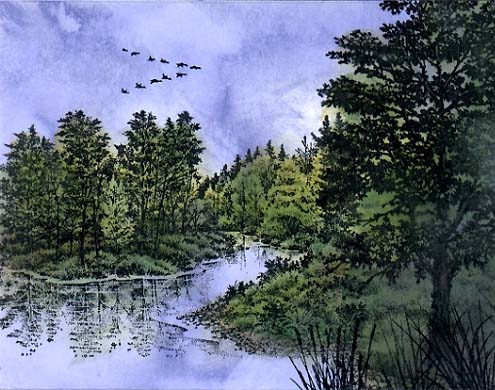
Use black Marvy ink and stamp #262A "Loon W/ Reflection," and #122F "Bare Branch Large." The little stamps give your scene personality and interest. The bare branches add another layer of depth.
I'd love to hear from you. Linda Ellenwood