Early morning in the Lagoon. 4.25" x 5.5"

I started this scene by applying Ranger Sea Shell "Sea Grass" to the glossy card stock. With designs that are mainly solid black, doing the background color first or after you stamp the scene really doesn't matter too much.

Ranger Sea Shell "Ocean Aqua" was streaked into the card. I'm leaving some areas lighter. There really wasn't a set plan as far as where these light zones would be. I just started streaking the color in and let the background start to develop.

Marvy #10 "Light Blue" was streaked in to the card. This color is somewhat dark in value but, because I applied the slippery Sea Shells inks underneath it, it spread very easily.

Streaking the Light Blue on the card. Sometimes I use the Stylus Tool on its edge for a thinner streak.

Marvy #3 "Blue" was streaked to add even more value and depth into the scene. In this photo the scene looks more yellow than it is in the original.


Palm Cove was stamped in black ink.

For added foreground the palm Frond #1, #2, and #3 will be stamped in black. Here Frond #3 is being possitioned.

Frond #2 is being stamped here. Frond #2 leans to the right so I stamped it on the left side of the scene.

I wanted to blend the images and the background together a little more so I started adding black ink into the shadows.

I "edged" the scene with black ink which framed the scene off. I did this by blending in black ink on the corners of of the card.

Boating Fishermen is being stamped in black.

Water Pattern sm is being stamped in black.

In some Water Pattern impressions, I used the second or third stamping of the inking so that the impressions would have a variety of values from dark to light.
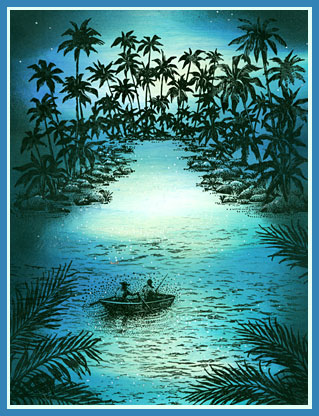
In the still of the night I cast my line into the water.