by Kevin Nakagawa, CA 2007
4" x 8.5" Stardream Chiara paper

I started out with this paper called Stardream Chiara. It is a pearlescent paper with a nice "shimmer" to it. I seem to have a weakness for certain types of papers and the metallics and pearescents are right up there. The color on this one is the pastel "Aquamarine".
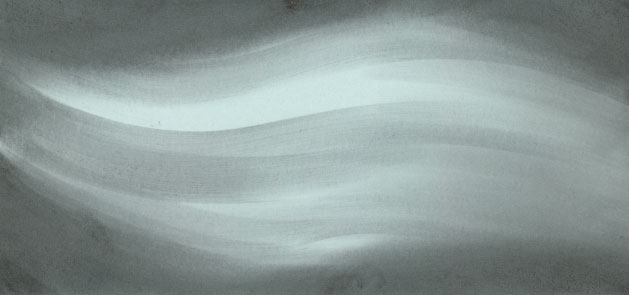
Using a Colorbox Stylus tool streaks of Marvy #1 "Black" were applied to the paper. I wanted to create a "whispy" look to the scene with a graceful multi value "S" curve. Use a light touch when making these streaks but this paper is forgiving as it's coated/sealed and dye based inks don't seem to soak into the paper very quickly. This allows for a more gradual transfer of ink. For the darker areas, it takes several applications of ink in those areas for the value to build.
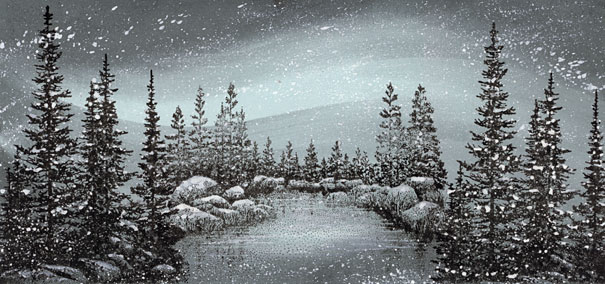
Images: Lakeside Cove Lg. and Pines and Rocks
The two images were stamped in a Versafine "Onyx Black". I found that the Versafine made a strong black impression on this paper where the Marvy did not. However, the Versafine didn't dry very fast so I sealed it with a clear acrylic spray.
From there, a Dr. Ph. Martin's "Bleed Proof White" was used to create a splattered texture across the scene. Bleed Proof White is a paint that comes in about a 1 oz. jar and it has an opacity to it that is designed to prevent the bleeding of whatever you're using it over such as inks or paint. A way that you can create this splattered surface is to take a stiff paint brush and, with paint loaded in the brush, run your thumb across the bristles causing them to spring back and spray ink on to the card. A toothbrush is a great applicator for this.
Some of the same bleed proof white was then used on a small paint brush to apply snow to the pine tree branches and rocks in a loose somewhat random order.
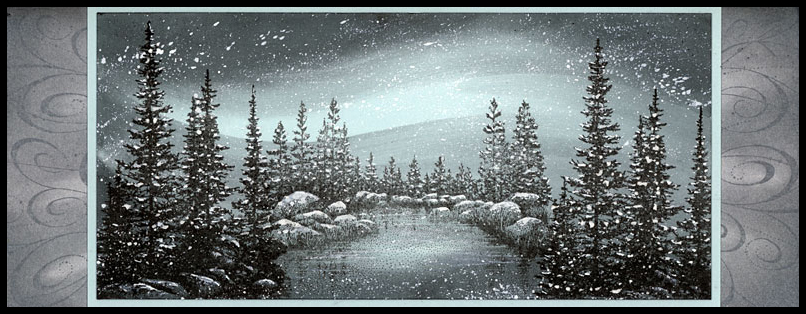
This is the scene matted with another layer of the "Aquamarine" and a Stardream "Silver" layer with the flourishes from the Butterflies unmounted sheet stamped in black with additional black tone/ink applied.