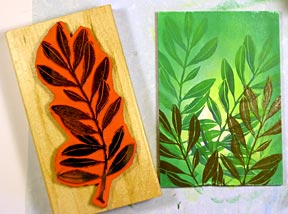
Here's a quick and easy One Stamp application of a Stampbord 3.5" x 5" bord and Olive Branch Q2087 from A Stamp in the Hand Co. For information or ordering this branch call Rick at ASITH:(310) 884-9700.
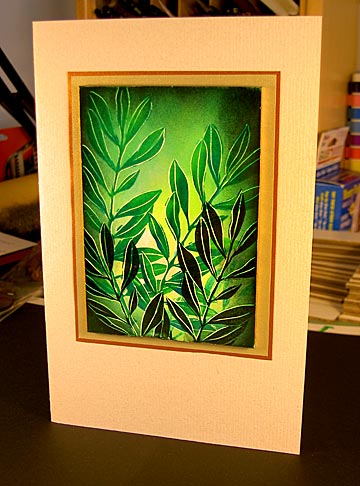
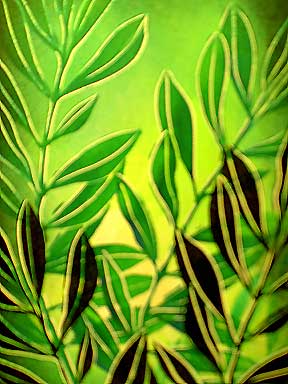
Original on 3.5" x 5" Stampbord. Tile sprayed with a Polyurethane clear spray (from Home Depot or the like) for a thick clear coating then mounted on colored and metallic paper.
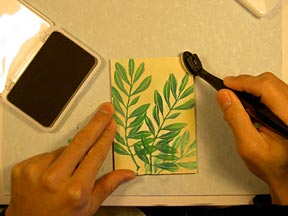
Coloring the Olive Branch with a Marvy Pen in dark and light green. I wanted a range of values on the leaves so I used pens instead of a pads.
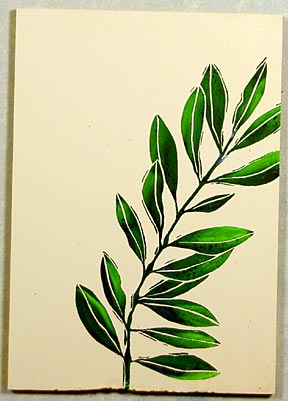
Variation of greens on leaves.
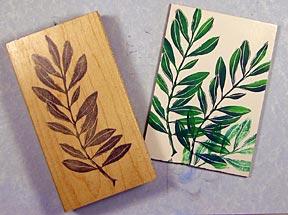
I colored and stamped the branch a second time and then used what ink was left to get one more lighter impression for a third branch on the bord.
Ranger Industries' Sea Shells "Green" was applied to the tile with a Colorbox Stylus Tool. Coverage over the entire scene was made.

Marvy Matchable "Light Green" and "Pale Green" was applied to the tile with a Colorbox Stylus Tool. I worked from the edges of the scene towards the center of the bord (out to in) leaving some of the center light. This gives the appearance of light coming from within the scene.
I went for two more impressions of the Olive Branch in black dye based ink to add more depth to the scene.
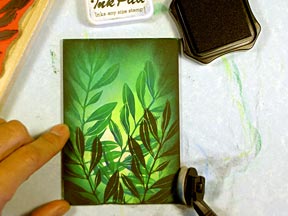
Marvy #1 Black dye based ink was applied to the tile with a Colorbox Stylus Tool on the corners to frame off the scene.
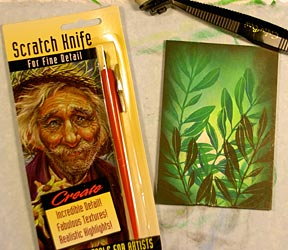
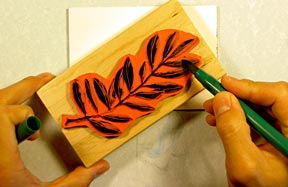
The Scratch Knife pack. Now that the scene is fully colored, I'm ready to start scratching my scene.
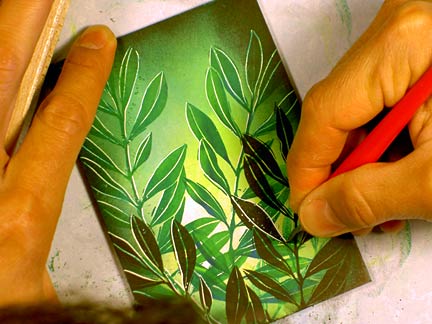
A Scratch Knife is being used to start the subtractive process. There's no right or wrong here. I decided to just outline the leaves by scratching through the ink around them, thus, revealing the white of the bord. I did this on the branch as well but only on one side of them to make it look like light was being cast on them.
A blurry close up of the leaves but I think you can get the point.
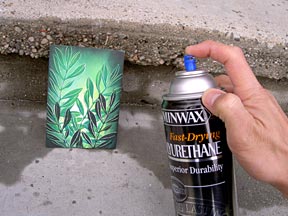
Spraying the bord with a Minwax Polyurethane to saturate the colors and to give a glass-like finish to the piece. I apply a thick coating and let it dry overnight --or just heat set it after I let the fumes dissipate for a while. Always spray your pieces in a well ventilated area. Preferably outdoors. For finished piece, return to top of lesson.