Black Beauty Pin
Note: Please read Polymer Clay Tips and Transparent Liquid Sculpey Tips prior to reading the lesson.
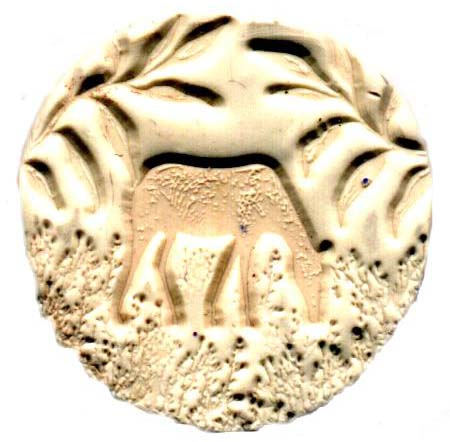
Roll out white clay to about 1/4 inch thickness. Cut a circle/medallion shape out of the clay that is slightly larger than a quarter. I took the Sculpey Glaze bottle and turned it upside down on the clay and cut around it with the exacto knife. Smooth edges with fingertip.
Note: be sure to brush a release agent on each stamp (as a release agent) prior to stamping into the clay with it. Horse 171A and stamp into the middle of the clay medallion. Bush 191A is stamped along the bottom of the clay medallion. Leaf Sprig 127A is stamped along the top of the medallion. Bake at 275 degrees (F) for 15 minutes, let cool.
Tint the Transparent Liquid Sculpey as follows:
Viridian Green oil paint + TLS = Dark Green TLS
Viridian Green oil paint + Yellow Oil paint = Light Green TLS
Burnt Sienna oil paint + a tiny bit of Black oil paint + Sparkle Gold
Pearl Ex = Shimmery Brown TLS
Black oil paint + TLS = Black TLS
Cerulean Blue oil paint + TLS = Blue TLS
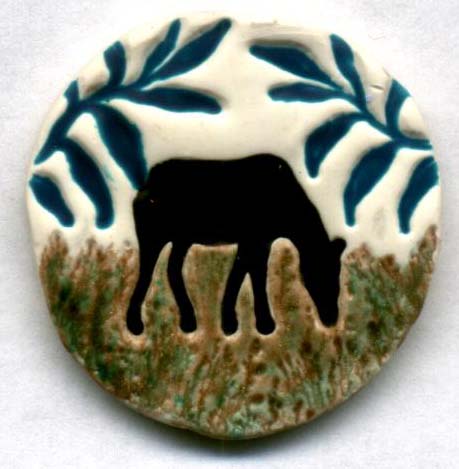
Using a tiny brush, fill the horse body with Black TLS. A tapestry needle is very effective in guiding the Black TLS to the small areas of the head and legs. Repeat this process with Dark Green TLS on the leaf sprigs. Paint the ground area with the Shimmery Brown TLS and then dot in small amounts of the Light Green TLS and blend with the brown. Do not forget to clean your paintbrush when you change colors of TLS. Bake for 15 minutes at 275 degrees (F) and let cool.
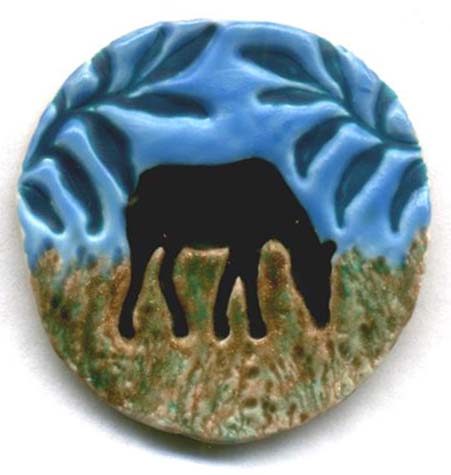
Paint any areas with the Shimmery Brown and Light Green TLS that are left white around the horse's legs and head. Heat set TLS as needed. Paint Blue TLS at the top of the piece, heat setting as needed. Bake for 15 minutes at 275 degrees (F).
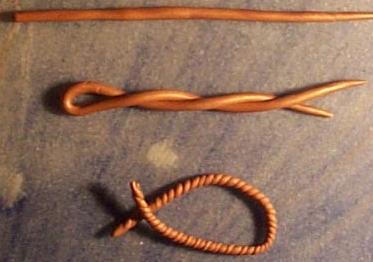
Now it is time to make a rope frame to go around the outside of the clay medallion. Roll out a long skinny snake of the gold Sculpey and fold it so that you have a skinny "U" shape. Twist the ends, like you would a twisty tie, until the rope is as long as you need it to be. The more you twist it, the skinner and longer it gets. Set aside.
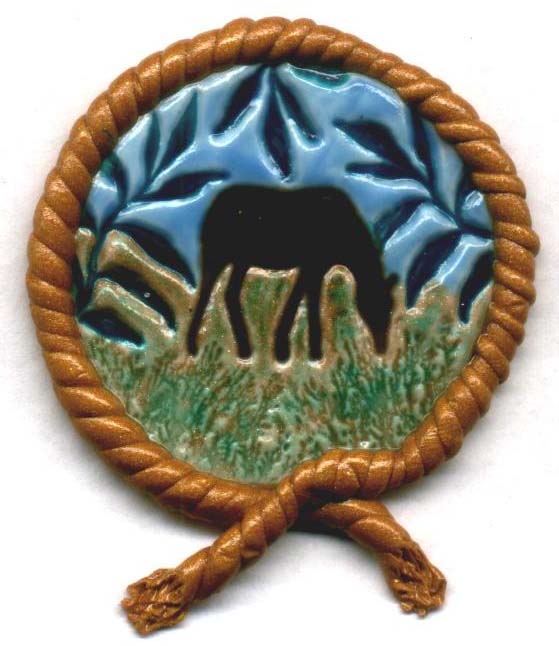
Brush clear TLS along the outer edges of the medallion and set it down on your baking surface. The clear TLS will act as a glue to hold the rope in place after baking. Press the gold rope to the outer edges and overlap the excess at the bottom. Texture the ends of the rope with a needle so they look frayed. Bake for 15 minutes at 275 degrees (F) and let cool. Brush on two coats of Sculpey Glaze/Gloss on top of the pin and let dry. Glue a pin back to the back of the clay medallion with E600 glue. Let dry.
"Black Beauty" by Tyra Smith October 2000
Finished Size: Slightly larger than a quarter.
Images: Stampscapes: 191A Bush, 171A Horse, 127A Leaf Sprig
Materials: Sculpey Polymer Clay/White, Sculpey III Polymer Clay/Gold, Grumbacher Oil Paints/Viridian, Yellow, Burnt Sienna, Black, Pearl Ex/Sparkle Gold, Transparent Liquid Sculpey,Sculpey Diluent, Sculpey Glaze/Gloss, paintbrushes, tapestry needle (or toothpick), exacto knife, heat gun, ceramic tile, oven, rolling pin (or pasta machine), artist grade turpentine (or low odor solvent), baby powder
Colour: Grumbacher Oil Paints