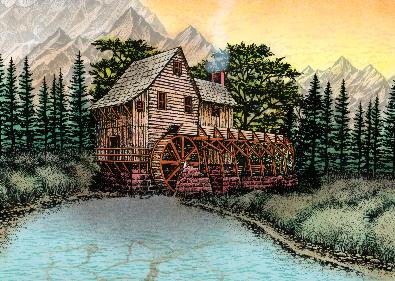
Mountain Mill
NOTE: Please read through the Masking and Basic Stipple Brush Technique instructions prior to reading the lesson.
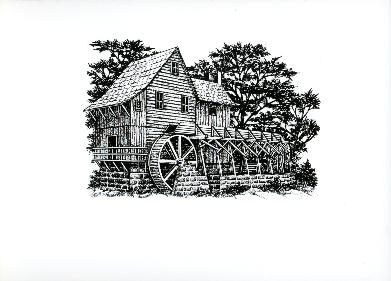
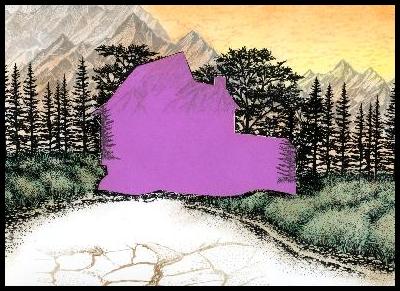
Water Mill Large 143G is stamped with Ranger Archival Jet Black ink.
Sedge Bank (right) 233F is stamped with Ranger Archival Jet Black ink on the right side of the mill. Be sure to line up the Sedge Bank (right) so that the smaller left side of the stamp is just below the brick foundation wall that holds up the water wheel. You will stamp stamp on top of the lower portion of the foundation wall but it will be OK because it makes the foundation wall appear to be set "into" the ground surrounding it.
Sedge Bank (left) 234F is stamped with Ranger Archival Jet Black ink on the left side of the water mill. Once again, over lap the Sedge Bank (left) on top of the lower brick foundation of the water mill.
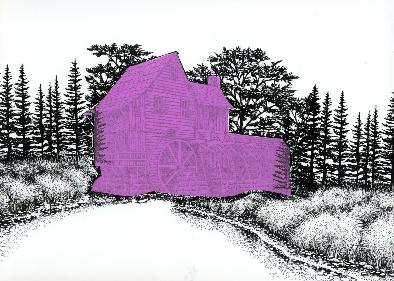
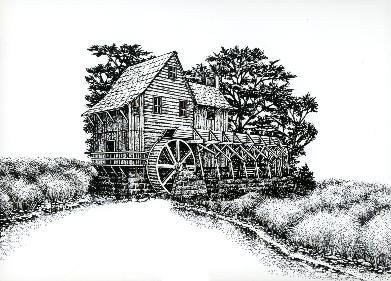
Mask the water mill. Pine Row 150E is stamped with Ranger
Archival Jet Black ink on the left and right sides of the water mill.
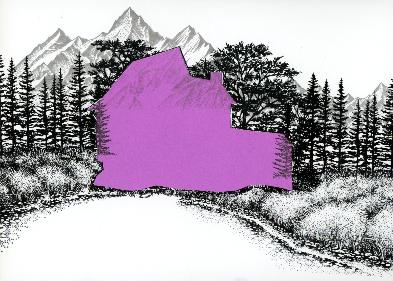
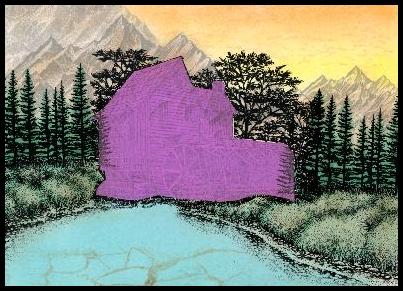
Rocky Peaks 188F is stamped with Marvy Matchable Gray ink
above and slightly to the left of the water mill. Complete the
mountain range and add depth by stamping Rocky Peaks Small
211C with Marvy Matchable Gray ink to the right of the mill.

Mask the large mountains above and slightly to the left of the water mill. Ink up Rocky Peaks 188F with Marvy Matchable Gray ink, stamp off on scrap paper and then stamp on and slightly above the mountain that is masked. This will give you a lighter shade of gray for the second mountain.
Now it is time to begin adding color to this scene. Stipple Ranger Sea Shells Conch Shell (light yellow) on the smaller mountain peaks to the right and across the bottom of the sky area. Next, stipple Ranger Sea Brights Popsicle Orange starting at the top edge of the sky area and stippling down toward the yellow. Now stipple Ranger Sea Bright Beach Ball Yellow at the lowest points of the yellow area in the sky, this will add body to the yellow area. Stipple Ranger Sea Shells Peach Belini over the orange and down into the yellow of the sky area. The lighter color of ink will act as a blending agent for the sky colors. If more blending is needed to achieve a smooth color transition between yellow and orange, alternate stippling the Ranger Sea Shells Conch Shell and Peach Belini over the sky area.

Cloud (altocumulus) 194G is stamped is stamped in the open sky area with Ranger Sea Shells Seashell Pink ink. This will add some depth to your sky area.
Remove the mask on the mountain. First, lightly stipple HALOS Box Brown ink (light brown) on the mountain range. Don't forget to also stipple the smaller mountains to the right of the water mill. Be sure to stipple the color down to the base of the Pine Row 150E as the mountain range is behind them and will show through a tiny between the trees. Next, stipple Marvy Matchable Gray on top of the Box Brown you just stippled. If additional blending is needed, stipple Ranger Sea Shells Sandal ink on top of the mountain range.
Stipple Ranger Adirondack Mushroom over the ground area, being sure to bring the color down over the shoreline and into the water area a tiny bit. Next, stipple Ranger Sea Brights Awning Green over the ground area. Awning Green is fairly bold, so you might want to tap the stipple brush off once or twice on scrap paper before stippling on the cardstock. Finally, stipple another layer of the Ranger Adirondack Mushroom over the ground area. Using a smaller brush, stipple the Awning Green over the darker areas of the ground in order to help define the ground's shape.
Cracked Earth 181G is stamped in the lower center area of the pond with Ranger Adirondack Mushroom. Ink up the stamp and then stamp off twice on scrap paper before stamping on your cardstock without re-inking the stamp.
Stipple Ranger Sea Shells Cloudy Blue over the water area. Next stipple a layer of Ranger Sea Shells Ocean Aqua over the water area, followed by a stippled layer of Ranger Vintage Ocean.
Fluff the pine tree row by stippling Ranger Archival Emerald over the pine trees, then stipple Ranger Archival Library Green on top of the Emerald to darken the trees as needed.
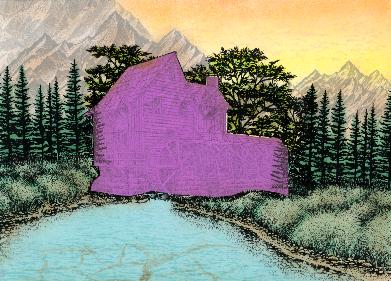
Since the trees directly behind the water mill are not pines, they need to be a different color of green. Stipple Ranger Vintage Citrus Lime over the branches directly behind the water mill. Next, stipple Ranger Sea Brights Awning Green on top of the Citrus Lime to add a bit of depth. Remember the Awning Green is very dark, you may want to tap on scrap paper a time or two before stippling on the cardstock. HALOS Box Brown is stippled along both shorelines.
Water Pattern Small 231C is stamped across the body of the water
in two rows. The first row is closest to the water mill and will be
lightest in color. Water Pattern Small 231C is inked up with
Ranger Vintage Ocean, stamped once on scrap paper and then
stamped once on the lower left side of the pond along the bottom of
the cardstock. Repeat this procedure and stamp across the
bottom of the pond until you get to the far right side. For the
second row...ink up the Water Pattern Small 231C with Ranger
Vintage Ocean...stamp off TWICE on scrap paper..now stamp on
the pond area above and overlapping a tiny bit on the top of the first
row you just stamped. Repeat across pond area. This allows that
water pattern to be darkest where it is closest to you..and then
lighter as it gets farther away from. It is important to note that this
step accomplishes two things:
1. It adds the illusion of movement to the surface of the water.
2. It adds depth because you stamped over the cracked earth
which pushes that image "underneath" the water's surface. It now
makes more visual sense that the cracked earth is the dirt which
has settled at the bottom of a shallow area in the water.
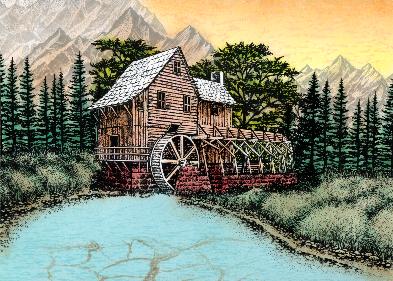
Remove the mask on the water mill. Lightly stipple Ranger Vintage Rosebud over the wood portion of the mill. Next, lightly stipple Ranger Adirondack Ginger over that same wood area. The Ginger color is rather bold so you may want to tap the brush off a time or two on scrap paper before stippling on the cardstock. Combining the Rosebud and Ginger colors will give the wood an "aged/weathered" look. Go back now and stipple the Ginger color again on the areas of the water mill that are in shadow. Look at the stamped image for clues of where the shadow might be located, the water mill has more of those tiny black dots where the shadows are. Using a small brush stipple the Ranger Vintage Citrus Lime over the wooden slatted area below the water flume on the right of the mill where the trees behind the mill show through the slats. Don't worry if the green gets on the wooden slats, we will take care of that later.
Stipple Ranger Adirondack Slate over the brick foundation of the water mill, then stipple Ranger Adirondack Red Pepper over the slate on that same brick foundation. Once again, the combination of these two colors will make the brick foundation appear to be aged/weathered.
Stipple Ranger Adirondack Mushroom over the roof/shingle areas of the water mill, then stipple Ranger Adirondack Slate on top of the mushroom until the roof areas are as dark as you want. Using a small brush (or red marker) paint the chimney with Ranger Adirondack Red Pepper.
Since the base images of this scene are stamped with Ranger Archival Jet Black ink, we can use markers on top of it without smearing the underlying lines of the stamp image. Using the small tip of a Marvy LePlume II #6 brown marker, color over the wood support beams, window sills, water wheels and fence of the mill. This step is not necessary, though it does add a very nice touch of realism and takes very little time to do.
I want to give a visual clue to indicate temperature and the chimney provides the perfect opportunity for this. It is fairly obvious that the season is either spring or summer, due to the color of the trees and grass. If we were able to create visibly smoke coming out of the chimney then the viewer will know that temperature is somewhat chilly which reinforces the idea that the season is early Spring. Take a Q-tip and dab it on top of a White VersaColor Pigment inkpad. Now tap the Q-tip above the chimney and create a trail of smoke going upwards from the chimney for the smoke. Yes, as a general rule pigment inks do not air dry on glossy cardstock. The exception to this rule is the VersaColor pigment inkpad. I have found that this Versacolor Pigment Inkpad DOES air dry on glossy cardstock. You can use a heat gun to speed up the dry time if you like. Be sure the smoke is dry, then add another layer of the white pigment ink to the smoke and let it dry.
Stipple Ranger Adirondack Slate at the base of the mill, down into the water a bit and along the pine tree row on both sides of the mill. Next, stipple Ranger Sea Brights Mussel Black over the the Slate you just stippled. This will create the shadow of the water mill and helps define the position of the light source.

To begin the directional cue, Oak Branch 203G is stamped with Ranger Archival Jet Black in the upper left corner. Reeds Large 068D is stamped repeatedly with Ranger Archival Jet Black over the left corner area.
To complete the directional cue and finish the piece, Ducks in Water 026B is stamped with Ranger Archival Jet Black in the lower left corner. Solo Duck 162A is stamped with Ranger Archival Jet Black in the upper right area of the sky. Note: be sure to wipe off the ink on the Ducks in Water 026B stamp prior to stamping it on your cardstock.
"Mountain Mill" by Tyra Smith January 2001
Finished Size: 5 x 7 inches
Images: Stampscapes®: 143G Water Mill Large, 181G Cracked Earth, 194G Cloud (altocumulus), 203G Oak Branch, 188F Rocky Peaks, 233F Sedge Bank (right), 234F Sedge Bank (left), 150E Pine Row, 068D Reeds Large, 211C Rocky Peaks Small, 231C Water Pattern Small, 026B Ducks in Water, 162A Solo Duck
Materials: King James Cast Cote Glossy White 10 Point Cardstock, stipple brushes, post-it notes, exacto knife, Q-tips
Colour:
HALOS Dye Inkpads: Box Brown
Marvy Matchables Dye Inkpads: Gray
Ranger Archival Dye Inkpads: Emerald, Jet Black, Library Green
Ranger Adirondack Dye Inkpads: Ginger, Mushroom, Red Pepper
Ranger Vintage Dye Inkpads: Citrus Lime, Ocean, Rosebud,
Spring Floral
Ranger Sea Brights Dye Inkpads: Awning Green, Beach Ball
Yellow, Popsicle Orange
Ranger Sea Shells Dye Inkpads: Cloudy Blue, Conch Shell,
Ocean Aqua, Peach Belini, Sandal, Seashell Pink
VersaColor Pigment Inkpads: White
Marvy LePlume II Marker: #6 Brown