Island Mystique
NOTE: Please read through the Masking and Basic Stipple Brush Technique instructions prior to reading the lesson.
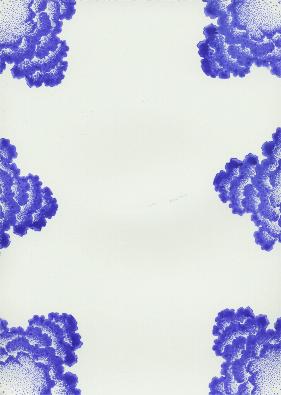
To begin the cloud frame, Dark Cloud 189F is stamped with Ranger Archival Berry Purple in all four corners and in the middle of each of the longest sides. Only the largest cloud on this stamp is inked and stamped on the cardstock.
Mask the clouds you just stamped, being sure to aggressively cut the masks. (I cut the masks so that when I applied them to the cardstock, the darkest part of the stamped cloud around all the edges still showed) To complete the cloud frame, Dark Cloud Small 209C is stamped with Ranger Archival Berry Purple in between the clouds you previously stamped.
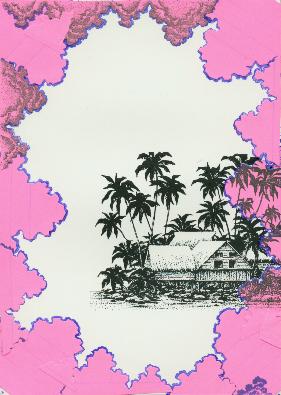
Mask the smaller clouds you stamped to fill out the cloud frame. The entire cloud frame all around the cardstock should now be masked. Palms with Huts 094G is stamped with Ranger Archival Jet Black on the right side.

Palm Cove 096G is stamped with Ranger Archival Jet Black on the left side of the huts to complete the landmass. You will only use the right third of this stamp. Island Mountain Large 095G is stamped with Ranger Adirondack Slate first on scrap paper and then on the cardstock above the huts without re-inking.
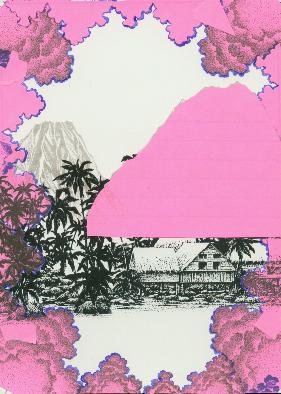
Mask the large mountain you just stamped. Island Mountain 099E is stamped with Ranger Adirondack Slate first on scrap paper and then on the cardstock to the left of the larger mountain you just stamped without re-inking.
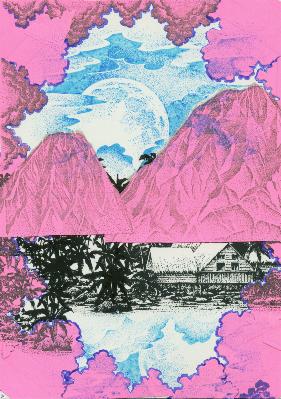
Mask the smaller mountain. Cloud w/Rising Moon Large 198G is stamped with Ranger Sea Brights Sailboat blue first on scrap paper, then on the cardstock centering the moon itself between the two mountains in the sky area without re-inking. Turn the moon stamp upside down and without re-inking, stamp it on the cardstock over the water area at the bottom - this is the reflection of the moon on the water.
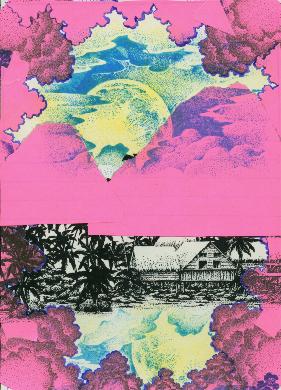
Stipple Ranger Sea Brights Beach Ball Yellow over the moon and along some of the lighter cloud areas in the sky. Stipple the same yellow over the reflection of the moon in the water. When stippling the yellow in the water, first tap off your brush about 2 times on scrap paper, then stipple on the cardstock. This will give you a muted yellow color for the reflection of the moon on the water.
Stipple Ranger Sea Shells Cloudy Blue in the sky area. Stipple Ranger Vintage Spring Floral over the sky area. Finally, stipple Ranger Sea Brights Sailboat Blue over the darker areas of the sky. This should give you a fairly dark sky, indicative of a cloudy night. Note: When stippling the blues in the sky, you may wish to overlap some on the yellow in the clouds, but do not stipple the blues over the moon itself.
Stipple Ranger Sea Shells Ocean Aqua over the water area, being sure to stipple over all the yellow areas of the reflected moon in the water. Stipple Ranger Vintage Ocean in the water area, do not stipple this color over the yellow areas of the yellow reflection in the water.
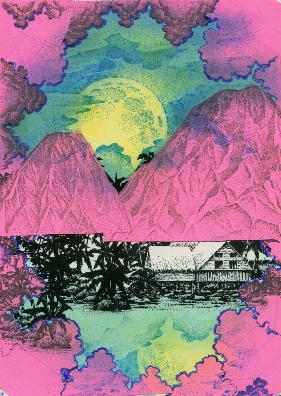
Remove masks on both mountains. Water Pattern Small 231C is stamped with Ranger Vintage Ocean first on scrap paper and then on the water area of the cardstock without re-inking. Stamp the water pattern as many times as needed to "texture" the surface of the water, being sure to stamp OVER the reflected moon.
Stipple Ranger Vintage Floral over the top and sides of both mountains (this is a fairly dark blue so you may want to tap a few times on scrap paper before stippling on the mountains). You want to bring a little of the sky color onto the surface of your mountain, which helps to blend the mountain range with the sky. HALOS Box Brown is stippled on the moutains, being sure to stipple the brown lightly over the the blue on the mountain sides and tops. Ranger Adirondack Slate is stippled over the entire area of both mountains to blend and smooth the colors.
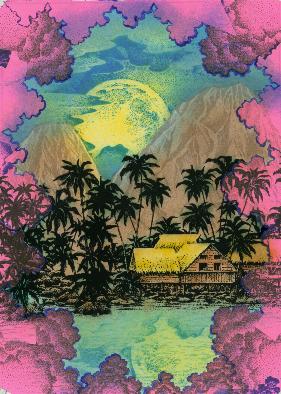
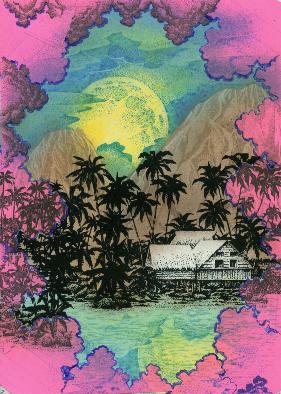
Using a smaller brush, sort of "swipe" Ranger Archival Mustard on the tops of the huts. Do the same thing with the wood parts of the huts using Ranger Archival Russet.
Now for the HARDEST part of this tutorial. You will have to force yourself to "color outside the lines"!!! The palm trees are all pretty much a solid black. In order to give the viewer a visual cue that the palms are green, you need to "fluff" ranger Archival Emerald over the palm tree tops and slightly outside the "black defining lines" of the palm tree tops.
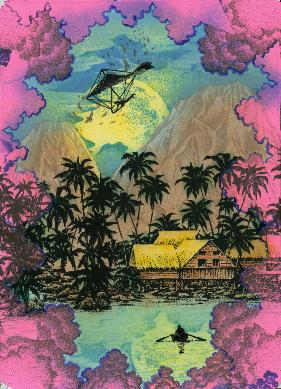
Flock 112A is stamped twice in the upper left sky area with Ranger Adirondack Slate. Hanglider Large 045B is stamped with Ranger Archival Jet Black at an angle over the moon in the sky. The moon will backlight the hanglider. Row Boat 166A is stamped with Ranger Archival Jet Black in the lower left corner of the moon's reflection in the water.
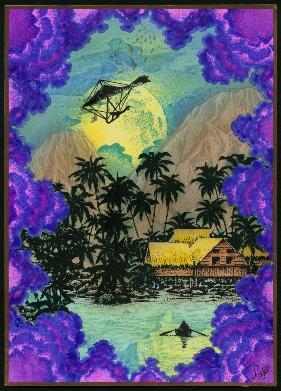
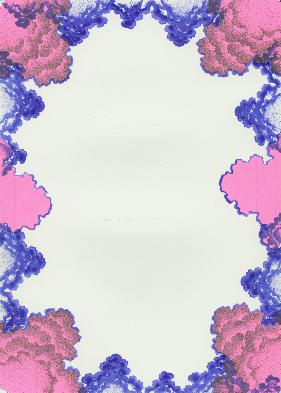
Remove all the remaining masks. Stipple or brush Ranger Sea Brights Bikini Pink and Purple Surf into the clouds of the cloud frame.
To reinforce the concept of a framed piece, a Krylon Copper Leafing Pen is used to edge all four sides with copper.
"Island Mystique" by Tyra Smith April 2001
Finished Size: 5.0" x 7.0" inches
Images: Stampscapes®: 094G Palm w/Huts, 095G Island Mountain Large, 096G Palm Cove, 198G Cloud w/Rising Moon, 189F Dark Cloud, 099E Island Mountain, 209C Dark Cloud Small, 231C Water Pattern Small, 045B Hanglider Large, 112A Flock, 166A Row Boat
Materials: King James Cast Cote 10 point glossy white cardstock (5x7 inches), exacto knife, post-it notes, stipple brushes, Krylon Copper leafing pen.
Colour:
Ranger Archival Dye Inkpads: Berry Purple, Russet, Mustard,
Emerald, Jet Black
Ranger Adirondack Dye Inkpads: Slate
Ranger Sea Brights Dye Inkpads: Sailboat Blue, Beach Ball
Yellow, Bikini Pink, Purple Surf.
Ranger Sea Shells Dye Inkpads: Ocean Aqua, Cloudy Blue
Ranger Vintage Dye Inkpads: Ocean, Spring Floral
HALOS Dye Inkpads: Box Brown