Shattered Glass Wallhanging
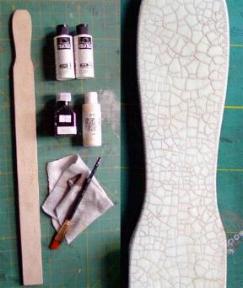
Collect necessary materials for this project. I am using a large paint stir stick that I got free of charge at Menard's in the paint department. The paint stir stick is approximately 21 inches long, 1.5 inches wide and 1/4 inch thick. Using 220 grit sandpaper, sand all sides of the paint stir stick until smooth to the touch. Using acrylic paints, paint all sides of the paint stir stick. It may take 2-3 coats of paint depending on what you use. For this project, an off white/almond color of acrylic paint was used to paint the paint stir stick. Set aside to dry. OPTIONAL: Anita's Fragile Crackle medium was used on the paint stir stick after painting it to give it an aged look and feel. If you choose to do this, follow the instructions on the Fragile Crackle bottle. Walnut ink was used to bring out the cracks and to give the paint stir stick and "old" feel. Metallic Rub-Ons or Powdered Pigments will also work well in place of the walnut ink. Once finished, spray the finished paint stir stick with a spray sealant. Set aside.
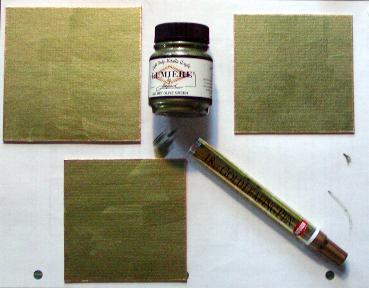
Cut matteboard pieces as follows: 4 x 4 inch square - cut 1 3.50 x 3.50 inch square - cut 2 Paint matte board squares desired color with acrylic paints. Lumiere Metallic Olive Green acrylic paint was used with the sample project. Set painted matteboard pieces aside to dry. When paint is dry, edge all four edges of each square with a Krylon Gold Leafing pen. Set aside to dry.
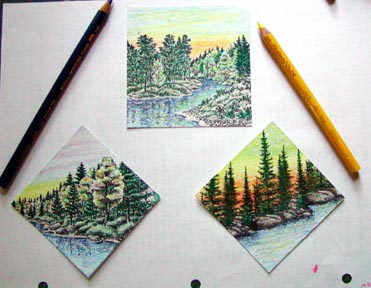
Petal Paper (matte cardstock) was used for the project sample. Any light colored matte cardstock will work. Cut cardstock as follows: 3.50 x 3.50 inch square - cut 1 -Cut cardstock and lay so that it looks like a square. Stamp Autumn Brook 212G with Ranger Archival Jet Black ink and color with colored pencils. 3 x 3 inch square - cut 2 -Cut cardstock and lay so that it looks like a diamond. Using Ranger Archival Jet Black ink, stamp Autumn Bank Right 214G on one diamond and Pines & Rocks Small 267E on the other piece. The Pines & Rocks Small 267E is stamped three times across the diamond to create the landmass. Color as desired with colored pencils.
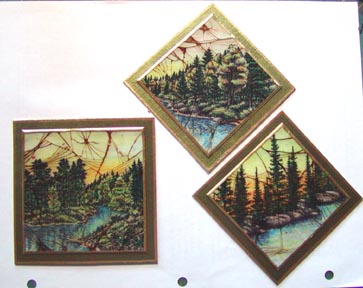
Using a clear embossing pad (I used a Ranger Clear Emboss-It pad), evenly tap/smoosh embossing ink over the top of the stamped/colored cardstock squares. Shake on clear Ultra Thick Embossing Enamel (UTEE), knock off excess UTEE and heat. You will get a somewhat "pebbled look". Repeat this process two more times until you have three layers of UTEE and it looks smooth as glass. Let cool. Once it is cooled, bend the square and make the UTEE "crack". It will look like a broken pane of glass. You can "crack" it as much, or as little, as you like. Using a paper towel, put a little ink from a reinker bottle on the paper towel and rub it all over the cracked piece, working it gently into the cracks. Ranger Archival Sepia was used for the project sample. Use a soft cloth or clean paper towel to wipe off excess ink. This ages the square and makes it look "cracked". Repeat the process with the other two stamped/colored cardstock squares. Using a Krylon Gold Leafing Pen, edge all four sides of each square with gold. Using either double sided tape or an appropriate adhesive, firmly affix the cracked glass cardstock pieces to the top of the Olive Green matteboard pieces. These are your completed Shattered Glass Pieces. Set aside.
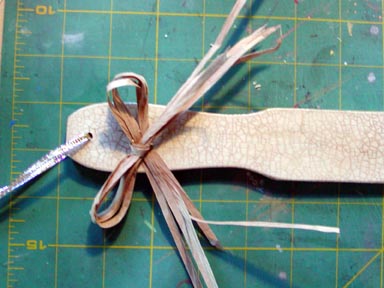
Drill a hole at the top of the paint stir stick. Thread a ribbon (or other type of fibre/yarn/leather piece) thru the hole, tie in a knot and cut off excess. This is the hanger. Create a raffia bow and affix to top of the paint stir stick just below the hanger.
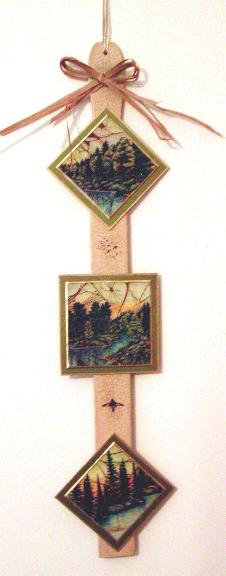
Affix shattered glass squares to the paint stir stick using a strong adhesive. Heavy duty double sided carpet tape was used in the project sample. Flock 112A is stamped directly on the stir stick with Ranger 213 black ink between the first and second shattered glass squares. Row Boat 166A was stamped directly on the stir stick with 213 black ink between the second and third shattered glass squares. Let dry. All done !!! The Shattered Glass Technique originator is Suze Weinberg. I would like to say a special "Thank You" to Suze for being such an inspiring innovator within the stamping and arts and crafts industries!!! THANK YOU SUZE !!!!!!!!!
"Shattered Glass Wallhanging" by Tyra Smith 2002
Images: Stampscapes: 214G Autumn Bank Right, 212G Autumn Brook, 267E Pines & Rocks Small, 166A Row Boat, 112A Flock
Materials: large paint stir stick, 220 grit sandpaper, paintbrushes, Petal Paper, Anita's Fragile Crackle Medium, paper towels, matte spray sealant, matteboard, exacto knife, scissors, Krylon 18 Kt Gold Leafing Pen, Ranger Clear Emboss-It Inkpad, clear Ultra Thick Embossing Enamel, heat gun, electric drill, ribbon, raffia, double sided tape
Colour:
Ranger Archival Ink: Jet Black (inkpad) and Sepia (reinker), Ranger
213 Ink: Black (inkpad), walnut ink, Dr. Martin's Metal Craft
Paint/Almond, Lumiere Metallic Olive Green acrylic paint, Berol
Prismacolor colored pencils