Rocky Mountain Lullaby
NOTE 1: Please read through the Basic Stipple Brush Technique instructions prior to reading the lesson.
NOTE 2: All inks used for stippling and stamping are dye inks unless otherwise noted. Brand is not as important as color, so brand names have been left out.
Autumn Bank Right 214G is stamped with black on the left side to create a landmass which is different than what one would normally stamp with this image.
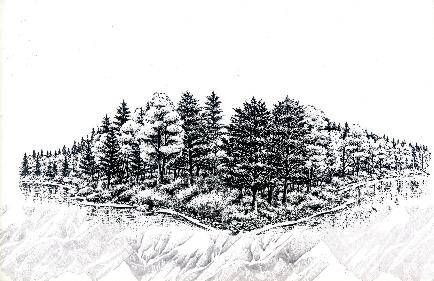
Autumn Bank Left 213G is stamped with black, overlapping the edges of the trees in the center of the landmass. Rocky Peaks 188F is stamp upside down with gray ink as a reflection in the water. To get the lighter stamped reflection in the water, ink up the stamp and stamp it once or twice on scrap paper. Now stamp it on your card stock without re-inking the stamp.
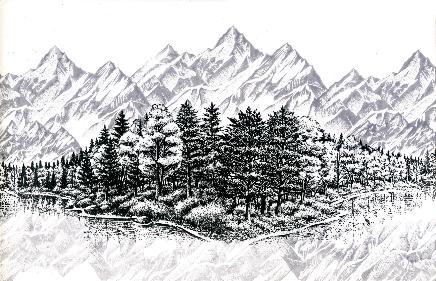
Rocky Peaks 188F and Rocky Peaks Small 211C are stamped with gray ink, overlapping the top of the trees a tiny bit. Do not stamp off on scrap paper prior to stamping on your card stock.
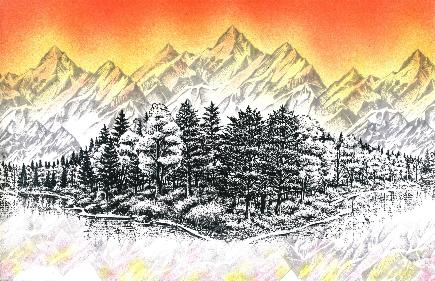
Stipple yellow along the tops of the mountain range and into the sky. Also stipple yellow in the reflection of the mountain range in the water. Stipple peach from the top of the card stock down into the yellow a tiny bit. Stipple orange over the peach without getting the orange into the yellow. Be sure to lightly stipple the sky colors onto the slopes of the mountain range and in the reflection of the mountain range in the water. If you sky looks a bit like a rainbow without smooth transitions of color between yellow, peach and orange, stipple yellow starting at the top of the mountain range and up into the sky. Stipple the whole sky with yellow to blend all three colors.
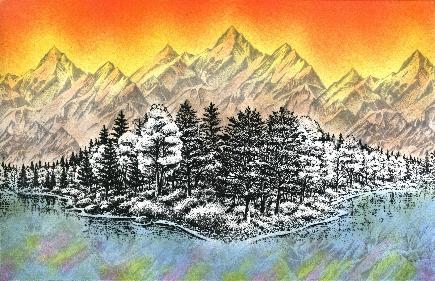
Stipple light brown starting along the tree line and up into the mountain range, remembering that the mountains will be darkest towards the base and lighter towards the peaks. Stipple gray over the brown and up into the yellow and peach streaks in the mountain slopes. Lightly stipple olive (or light green) into the water area. Do not go for a full coverage of the green, only splotch it in here and there within the water area. Stipple light blue over the entire water area, then stipple medium blue over the water area.
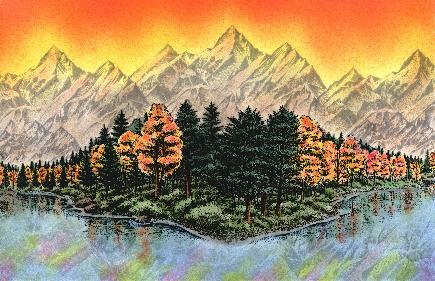
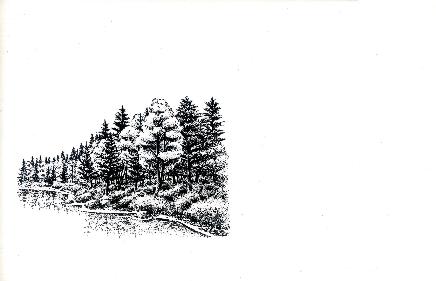
Stipple brush over the ground area, then stipple light green on top of the brown. Stipple yellow, red and orange into the oak trees. This simulates the colors of fall foliage and really sets off the scene as an Autumn piece. Stipple dark green over the pine trees. Remember that you can use smaller white bristled paint brushes for tight spots and areas where you need a greater control of the application of dye inks. Using a small brush, apply light green to the shaded areas of the oak trees and apply olive green to the shaded areas of the ground in order to fully bring out the beautiful shape of the ground. Brush gray over the sandy shoreline area and brush brown over the rocks and pebbles along the shoreline. Lightly stipple orange, red and green into the tree reflections in the water. Because this is a day scene, you are more likely to see the Autumn colors reflected in the surface of the water. For further definition of the shoreline, use a small brush and lightly brush the medium blue along the shoreline area.
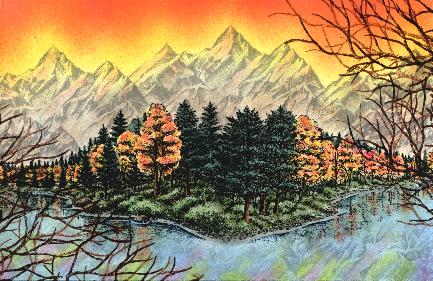
Bare Branch Large 122F is stamped first with light brown and then with dark brown in opposing corners. Stamping the branch in two shades of brown will accomplish two things: it reinforces the concept of an Autumn scene and it creates the beginning of the directional cue for the viewer.
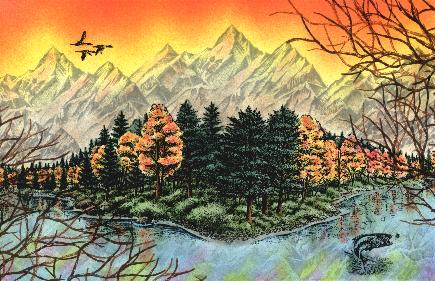
Duck Trio in Flight 023A and Jumping Bass Large w/Fly are stamped in opposing corners opposite to the Bare Branch Large 122F. This completes your directional cue and defines the diagonal.
"Rocky Mountain Lullaby" by Tyra Smith September 2000
Finished Size 5.5 x 8.5 inches (half sheet)
Images: Stampscapes®: 213G Autumn Bank Left, 214G Autumn Bank Right, 122F Bare Branch Large, 188F Rocky Peaks, 211C Rocky Peaks Small, 047B Jumping Bass Large w/Fly, 023A Duck Trio in Flight
Materials: King James Cast Cote 10 Point (White), Stipple brushes
Colour: HALOS dye ink pads, Marvy Matchables dye ink pads, Printworks Dye Ink pads.