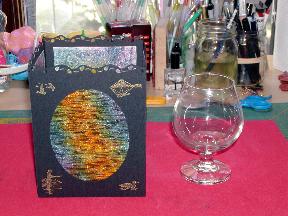
CrystalScapes Luminary
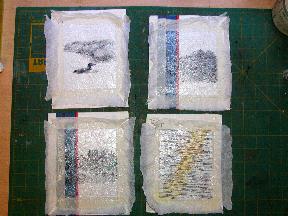
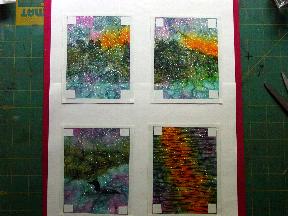
Cut transparency sheets into 4 pieces that measure 4.25 x 5.5 inches each. Stamp images on transparency with Brilliance Graphite Black, set aside to dry. - for transparency #1: use Mystical Waters 255G, stamp as many times as needed to fill up transparency. - for transparency #2: use Autumn Bank Left 213G, centering image on transparency. - for transparency #3: use Autumn Brook 212G, centering image on transparency - for transparency #4: use Sedge Bank Left 234F, centering image slightly above the middle. Loon 260C is stamped below and slightly to the right of Sedge Bank Left 234F Once the ink is dry on the transparencies, tape each transparency to a stiff piece of cardboard with masking tape, be sure the UNSTAMPED side of the transparency is facing you when you tape it to the cardboard. (we work this technique on the back/unstamped side of the transparency) The masking tape only covers up about 1/8 of an inch of the transparency on all four sides.
Take a large piece of uncoated white tissue paper, crumple it into a ball and then gently fold it out flat again. It should be wrinkled. Pour a liberal amount of Future Floor Wax on the transparency and use a soft, flat paintbrush to cover the entire transparency with floor wax. Sprinkle ultra fine glitter (I used Prisma Glitter Ultra Fine Multi Color) on top of the wet floor wax. Lay wrinkled tissue paper on top of wet floor wax and glitter, gently use the soft flat paintbrush to press tissue down into the floor wax. Do not scrub with the brush or it will tear the tissue paper. If tissue gets torn, take a small piece of tissue paper and lay it on top of the tear. Make sure that all tissue paper covering the transparency is saturated with the floor wax. Complete this process on all four transparency pieces. Set aside and let dry. If you used heat resistant transparencies, you can speed dry with a heat gun - be very careful to not warp or melt the transparency.
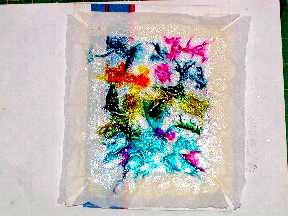
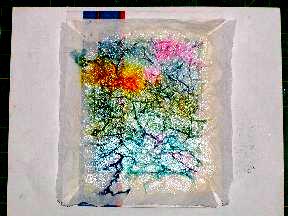
Pour a liberal amount of Future Floor Wax on top of the dried transparency. While floor wax is wet, add drops of ink from reinkers on the wet floor wax. The following reinkers are used for this project: Ranger Sea Brights Dye Reinkers: Beach Ball Yellow Ranger Sea Shells Dye Reinkers: Ocean Aqua, Starfish Green, Sea Grass, Tropical Raspberry and Cloudy Blue. Note: for deeper and darker colors, Ranger Adirondack Reinkers work beautifully!
Swirl/brush ink together with soft paintbrush, blending as desired. If the inks are too dark, lightly press a paper towel on top, then remove the paper towel. This will remove some color and also help to blend. Sprinkle a little more glitter on top of the wet ink/floor wax. Let dry. Complete this process on all four transparency pieces.
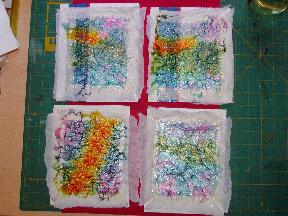
Once the ink/floor wax is dry, once again spread a liberal amount of floor wax on top, using a soft, flat paintbrush to make sure the entire area is coated with floor wax. Lay a flat, UNWRINKLED, piece of uncoated white tissue paper on top of the wet floor wax and smooth down with the soft, flat paintbrush. Set aside to dry. Repeat this process on all four transparency pieces.
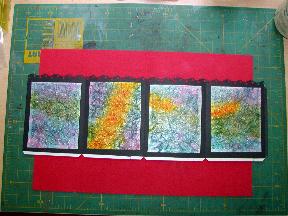
Once the transparency pieces are completely dry (I let mine sit overnight), remove the transparencies from the cardboard and trim off excess tape and tissue paper. These are your "Crystal Inserts". Apply double sided tape to the FRONT (stamped side) side edges of the Crystal Inserts (all four edges) and set aside. I use carpet tape because it has a strong hold and also has a liner on the tape. I leave the liner on the tape until I'm ready for the Final Luminary Assembly.
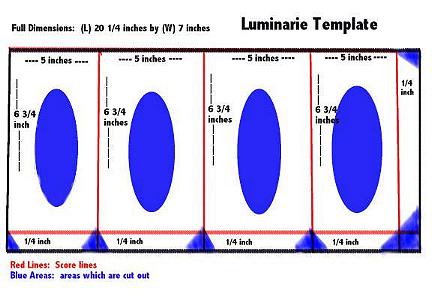
2. LUMINARY SHADE Note: it is best to do a "practice shade" with scrap paper so you can get the hang of it before working with your cardstock. Cut, or piece together two pieces of cardstock, so that they measure 20 1/4 inches long by 7 inches wide. Using a ruler and dry embossing stylus, score cardstock as indicated on Luminary Template. You will have four "panels" (each being 5 inches wide) and then one "lip" on the side that is 1/4 inch wide. There will also be a 1/4 inch "lip" along the bottom of each panel.
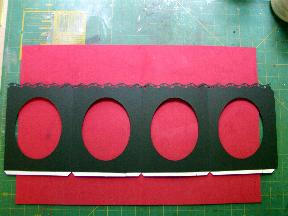
If you wish to use paper edger scissors or a Fiskar Border Punch along the top edge of the Luminary Shade, do so now. This IS optional. I used the Fiskar's Border Punch/Leaves in the sample. Using an oval template of some type (I used Evo's Acrylic Oval Templates), center, mark and cut out oval in the center of each of the four panels on the Luminary Shade. Fold along score lines and clip edges as indicated on Luminary Template. Affix double sided tape (I again used carpet tape), to bottom 1/4 inch lip of each of the four panels. This is the BACK of your Luminary Shade.
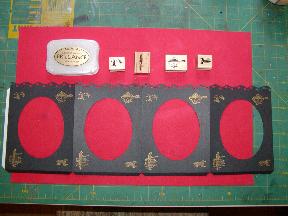
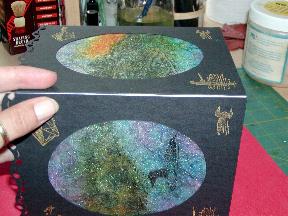
Turn Luminary Shade over, this is the FRONT of your shade. Affix double sided tape to the 1/4 inch lip on left side. On the FRONT of each of the 4 Luminary Shade panels, stamp the following images will Brilliance Galaxy Gold ink: - Upper Left Corner: Geese in Flight 039A - Lower Left Corner: Wading Fisherman 186B - Upper Right Corner: Hanglider 045B - Lower Right Corner: Loon w/Reflection 262A Set Luminary Shade aside and let ink dry.
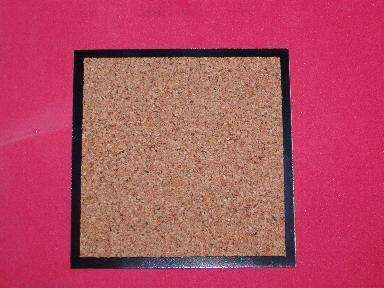
3. LUMINARY BASE: Cut a 5x5 inch square of matteboard (or still cardboard). If the matteboard is not the same color as your Luminary Shade, affix (glue or tape) a 5x5 inch square of cardstock the same color as the shade to the matteboard. Cut a 4 1/2 x 4 1/2 inch piece of cork, center and adhere it (glue or tape) to the matteboard. The side with the cork is the TOP of the Luminary Base.
4. FINAL LUMINARY ASSEMBLY: Turn the Luminary Shade so the BACK (unstamped side) is facing you. Remove liner from tape on the Crystal Inserts, position the Crystal Inserts over the cut out ovals of the Luminary Shade and press Crystal Insert to back of Luminary Shade. Do this with all four Crystal Inserts. NOTE: The FRONT side of the Crystal Inserts are affixed to the BACK SIDE of the Luminary Shade. Once finished, the back of the Luminary Shade will be facing you, and you will see the BACK of the Crystal Inserts.
Remove tape liner from the tape at the bottom of the back of each panel of the Luminary Shade. The tape will adhere the Luminary shade to the BOTTOM of the Luminary Base.
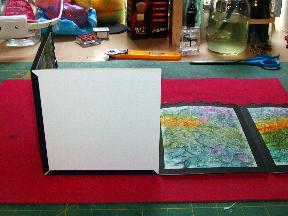
Affix the Luminary Shade to the bottom of the Luminary Base on all four sides. Remove tape liner from the remaining tape on the side of the Luminary Shade, press the tape to the BACK of the next panel to form a completed Luminary Shade.
Now, for the easy part!!! Set a votive candle inside the brandy snifter type glass and the glass inside the luminary. Light the candle, dim the lights and watch as the candle flame plays hide and seek within the illuminated crystal inserts!!!
"CrystalScapes Luminary" by Tyra Smith 2002
Images: Stampscapes: 212G Autumn Brook, 213G Autumn Bank Left, 255G Mystical Waters, 234F Sedge Bank Left, 260C Loon, 045B Hanglider, 186B Wading Fisherman, 039A Geese in Flight, 262A Loon w/Reflection
Materials: Small brandy snifter type glass, matteboard, cork, exacto knife, ruler, cardstock for shade (20 1/4 inches by 7 inches), Fiskars Border Punch/Leaves, Yes Glue, double sided carpet tape, Evo's Oval Templates, dry embossing stylus, transparency sheets/acetate, Future Floor Wax, masking tape, cardboard, ultra fine glitter, large soft flat paintbrush, uncoated white tissue paper
Colour:
Brilliance Pigment Inkpads: Graphite Black, Galaxy Gold
Ranger Sea Brights Dye Reinkers: Beach Ball Yellow
Ranger Sea Shells Dye Reinkers: Ocean Aqua, Starfish Green,
Sea Grass, Tropical Raspberry, Cloudy Blue

